We offer a wide collection of free, high-quality printable coloring pages for kids and adults. From cute animals to intricate mandalas, our designs bring creativity and relaxation to everyone. Download, print, and start coloring today!
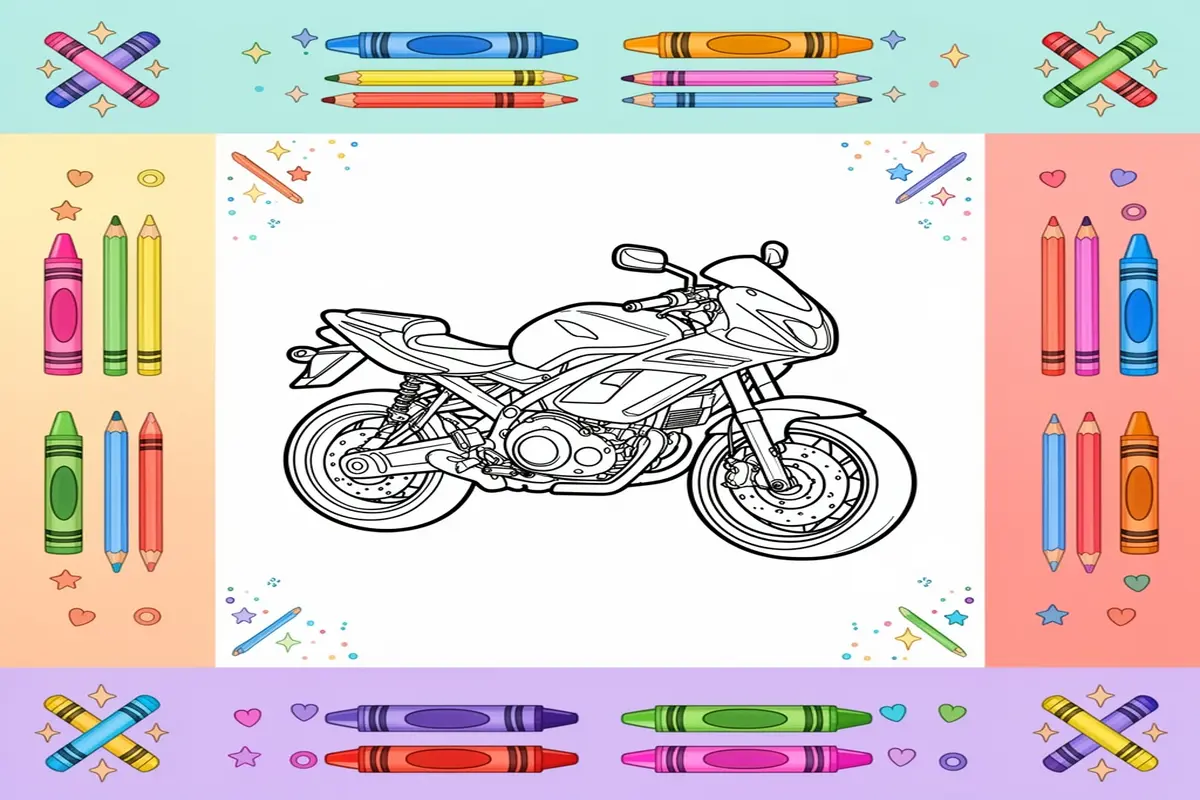
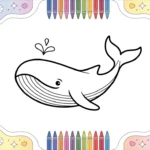
In the vibrant world of children’s art, few subjects spark the imagination quite like the roar of an engine and the thrill of the open road. motorcycle coloring pages for kids offer a dynamic gateway to creativity, blending the excitement of powerful machines with the calming, focused act of coloring. These aren’t just simple outlines; they are canvases for adventure, inviting young artists to design their dream bikes, imagine epic journeys, and explore a world of mechanical wonder through color. The appeal is universal, tapping into a child’s innate curiosity about how things work and their desire for speed and freedom. As a fantastic alternative to more serene subjects like our majestic free whale coloring pages, these pages channel a different kind of energy—one of power, innovation, and boundless imagination. Engaging with motorcycle coloring pages for kids provides a unique blend of artistic expression and thematic excitement that can captivate any young mind.
The Roar of Creativity: Why Motorcycles Captivate Young Minds
The Psychology of Power & Freedom
At their core, motorcycles symbolize autonomy, adventure, and mechanical elegance. For children, coloring these powerful machines is an exercise in control and creation. They get to decide if a bike is sleek and silver or blazing with neon flames, effectively becoming the designer of their own vehicle of adventure. This process of choice and customization is deeply empowering, fostering decision-making skills and personal expression. The very act of bringing a static motorcycle illustration to life with color can fuel narratives of cross-country trips or superhero rescues, making motorcycle coloring pages for kids a potent tool for imaginative play and storytelling.
A Historical Ride: From Sketch to Cultural Icon
The motorcycle’s journey from practical invention to cultural icon provides a rich, albeit subtle, backdrop for these activities. While children are coloring, they are interacting with a piece of design history—the evolution of the chopper, the sportbike, the classic cruiser. This offers a gentle, engaging introduction to engineering concepts and historical progress. Parents and educators can use these pages as springboards for discussions about transportation, innovation, and even safety, adding an educational layer to the artistic fun. The motorcycle, as a subject, connects art with real-world technology in a way that is both accessible and thrilling for a young audience.
Curated for Every Young Artist
One of the greatest strengths of motorcycle coloring pages for kids is their inherent scalability. For younger children or beginners, pages feature bold, simple outlines of bikes with clear, defined sections, perfect for practicing motor skills and color recognition. For older kids ready for a challenge, intricate designs showcasing detailed engines, complex wheel spokes, and dynamic racing scenes provide the perfect test of focus and precision. This range ensures that every child, regardless of skill level, can find a page that offers the right balance of enjoyment and achievement, making the world of two-wheeled design accessible to all.
Part 2: Professional Materials & Preparation for motorcycle coloring pages for kids
To transform a simple printable into a masterpiece, the right materials and a prepared workspace are key. This guide outlines the professional-grade supplies and setup that will elevate the experience of motorcycle coloring pages for kids, ensuring vibrant results and fostering a love for creative expression. Proper preparation not only improves the final artwork but also makes the activity more enjoyable and less frustrating for young artists.
The Foundation: Selecting Premium Paper for motorcycle coloring pages for kids
The paper you choose is the single most important factor in coloring success. For standard crayon or colored pencil work, a bright white, smooth cardstock (around 160-200 GSM) is ideal. It provides a sturdy surface that prevents bleed-through and allows for better color layering. If your child prefers markers, seek out marker-specific paper or heavyweight bleed-proof paper to prevent colors from seeping through and damaging the surface beneath. When printing intricate motorcycle coloring pages for kids, a higher GSM paper will hold fine details better, allowing children to color within the lines more easily. For a special project, consider using lightly textured watercolor paper if you plan to use water-based mediums, which can add an interesting dimension to the artwork.
Best Coloring Tools: A Detailed Medium Comparison
The choice of coloring medium dramatically affects the outcome of your motorcycle coloring pages for kids.
Colored Pencils: Opt for soft-core, wax- or oil-based pencils for rich, blendable color. They offer superior control for detailed areas like motorcycle spokes or engine parts. Look for sets with good pigment quality that require less pressure, which is easier for developing hand muscles. They are also mess-free and excellent for building fine motor skills.
Markers: Alcohol-based markers provide seamless, vibrant blends perfect for creating shiny, metallic motorcycle effects. However, they require bleed-proof paper. For younger children, water-based markers are a safer, less messy option. Broad-tip markers are great for large areas like the motorcycle’s fuel tank, while fine tips are essential for outlines and logos.
Crayons & Gel Sticks: While classic, they are best for younger children or broader, less detailed work. For more control, consider twistable crayons that don’t require sharpening. Gel sticks offer bold, opaque color and are easier to grip than traditional crayons.
Finishing Touches: Gel Pens, Highlights, and Outlines
Once the main coloring is complete, detailing tools can add professional flair. Metallic or glitter gel pens are perfect for adding chrome highlights to exhaust pipes, headlights, or wheel rims on a motorcycle. A white gel pen can be used to create reflections or correct small over-colors. For children who enjoy crafting, adding small stickers or using safe, child-friendly glue sticks to apply glitter can make the artwork pop. For a cohesive look, some artists like to re-outline the main features with a fine-tip black marker after coloring, which makes the image stand out sharply. This step can help define the powerful shape of the motorcycle.
Creating the Perfect Workspace: Ergonomics and Lighting
A well-prepared space encourages focus and creativity. Ensure the coloring area has bright, natural light or a good quality desk lamp to reduce eye strain and allow true color perception. The chair and table should be at an appropriate height so the child’s feet can rest flat and their arms can work comfortably on the surface. Keep supplies organized in cups or trays—this not only minimizes clutter but also empowers the child to manage their own materials. Having a clean, dedicated space for arts and crafts signals that this is a valued activity. For inspiration, you can explore other vehicle-themed pages, such as our collection of monster truck coloring pages, which share a similar exciting appeal. Finally, always protect the work surface with a large piece of cardboard or a dedicated craft mat, especially when using permanent markers or glue.
Part 3: Elevating Your Art: Advanced Techniques for Motorcycle Coloring Pages for Kids
Ready to transform those simple outlines into dynamic works of art? This section moves beyond basic filling to explore professional techniques that will make your motorcycle coloring pages for kids truly pop. These methods build fine motor skills, teach artistic concepts, and instill a sense of pride in creating something spectacular. For more detailed animal-themed texture practice, our lion coloring pages for kids offer excellent opportunities.
Harmonious Palettes: Color Theory for Motorcycle Coloring Pages for Kids
Choosing colors isn’t just about preference; it’s about creating mood and focus. Teach young artists two key concepts:
Complementary Colors: Colors opposite on the wheel (like blue and orange or red and green). Using these for details makes elements “vibrate” with energy—perfect for making a bike’s headlight or logo stand out against the body.
Analogous Colors: Colors next to each other (like blue, blue-green, and green). This scheme creates harmony and is ideal for rendering a realistic sky background or a sleek, gradient-style paint job on the motorcycle tank. Start with a base color and blend into its neighbors for a smooth, professional look.
From Flat to 3D: Mastering Shading and Depth
Shading is the magic that turns a circle into a sphere and a motorcycle into a machine with weight and form. Guide kids through this simple step-by-step process:
1. Identify Your Light Source: Decide where the “sun” is (e.g., top left). Every shadow will fall opposite.
2. Apply Base Color: Color the entire area evenly with your main hue.
3. Add Shadow: With a slightly darker shade of the same color, apply gentle pressure along the edges opposite the light. For a motorcycle wheel, shade the inner bottom curve; for the fuel tank, shade along its lower right if light is top left.
4. Highlight: Using a very light touch or even leaving a tiny white streak, add a small gleam where the light hits directly (e.g., on the top curve of the handlebars or the windshield). This contrast creates instant volume.
Adding Realism: Texture Techniques for Metal, Rubber, and Road
Different parts of a motorcycle demand different feels. Here’s how to achieve them:
Shiny Chrome & Metal: Use sharp pencils and leave stark white highlights. Color around them with smooth, even gray or silver strokes. For a brushed metal look, use quick, directional, straight lines.
Textured Rubber Tires: Use a back-and-forth, slightly scribbly motion with black or dark gray. Leaving tiny, uneven specks of white within the tread area mimics wear and texture.
Asphalt Road: Use a blending technique with multiple grays and browns. Color loosely in small circles or uneven patches to create a rough, granular appearance, perfect for placing under those roaring wheels. For more nature-based texture practice, explore our landscape coloring pages for kids.
The Art of Correction: Gracefully Fixing Coloring Mistakes
Mistakes are part of the process! Teach these recovery strategies:
Embrace the Cover-Up: Turn a stray mark outside the lines into a new element—a pebble on the road, a small cloud in the sky, or a decal on the bike.
Blend It Out: If a color is too dark or harsh, use a white colored pencil or a lighter shade to gently layer over and soften the area, blending it into the surrounding color.
* Strategic Redefinition: If coloring goes over a line, simply use a black marker or a darker pencil to carefully redefine the original boundary line, making the “mistake” part of the new background.
By mastering these techniques, children do more than just color—they learn to see like artists, understanding how light, color, and texture interact to bring their two-wheeled creations to life.
Showcasing Your Motorcycle Masterpieces: Creative Display Ideas
Once your young artist has filled their motorcycle coloring pages for kids with vibrant life, it’s time to celebrate their work! Moving beyond the coloring book, displaying their art boosts confidence and transforms their effort into a source of daily pride.
Preserving Your Masterpiece: Archival Tips
Protect those colorful creations from fading or damage. For long-term keepsakes, consider using acid-free sheet protectors in a binder or having special pieces laminated. A simple, inexpensive clip frame allows for easy swapping of new artwork. For a gallery wall, use washi tape or decorative clips on a string to avoid putting holes in the art. This teaches kids to value their work and creates a rotating exhibit of their progress.
Beyond Display: Creative DIY Projects
Turn colored pages into functional art and heartfelt gifts. Create custom greeting cards by folding a colored page in half and writing a message inside. Laminate and cut out smaller motorcycles to make unique bookmarks or gift tags. For a fun bedroom accessory, decoupage several colored pages onto a plain wastebasket or storage box. These projects extend the creative fun and make wonderful, personalized presents for family members.
Your Motorcycle Coloring Pages for Kids Questions Answered
How do you draw a motorcycle step by step for kids?
Start with simple shapes: two circles for wheels, a rectangle for the body, and a triangle for the seat. Connect them with lines to form the frame. Add details like handlebars, a headlight, and an exhaust pipe. Encourage kids to use a pencil lightly first, then trace with a marker. Remember, the goal is fun, not perfection! For ready-to-color options, explore our motorcycle coloring pages for kids.
Where can I find free printable motorcycle coloring pages?
You can find a fantastic variety of free, high-quality printable coloring pages right here on our website! We offer numerous themes to fuel any child’s imagination. If your artist also loves other vehicles, check out our exciting collection of airplane coloring pages for kids.
What are the benefits of coloring for children?
Coloring enhances fine motor skills and hand-eye coordination as children practice staying within lines. It fosters creativity and color recognition while also serving as a calming, focused activity that can reduce anxiety and improve concentration. It’s a wonderful screen-free way for kids to express themselves and build confidence in their abilities.
How to print coloring pages at home?
Ensure your printer has enough ink and paper. Download your chosen PDF or image file and open it. Select “Print” and choose “Fit to Page” in your printer settings for optimal sizing. For best results with motorcycle coloring pages for kids, use the “Best” or “High Quality” print setting to get crisp, clear lines that are easy for little hands to color.
What paper is best for printable coloring pages?
A medium-weight (24-32 lb) printer paper or cardstock is ideal. Cardstock prevents bleed-through from markers and handles crayon and pencil beautifully. For a special project, try matte photo paper for vibrant colors. Avoid very thin paper, as it can tear easily and doesn’t hold up well to enthusiastic coloring.
Final Thoughts: Your Creative Coloring Journey Begins
The adventure with motorcycle coloring pages for kids is about so much more than just staying inside the lines. It’s a journey of imagination, fine motor development, and quiet, joyful focus. Each page completed is a testament to your child’s growing skills and unique perspective. By displaying their work and turning it into gifts, you validate their effort and nurture a lifelong appreciation for creativity and art.
So, gather your brightest crayons and markers, celebrate every roaring engine and colorful design, and watch as confidence grows with every page. Ready for your next adventure? Explore our dirt bike coloring pages for more two-wheeled fun!