We offer a wide collection of free, high-quality printable coloring pages for kids and adults. From cute animals to intricate mandalas, our designs bring creativity and relaxation to everyone. Download, print, and start coloring today!
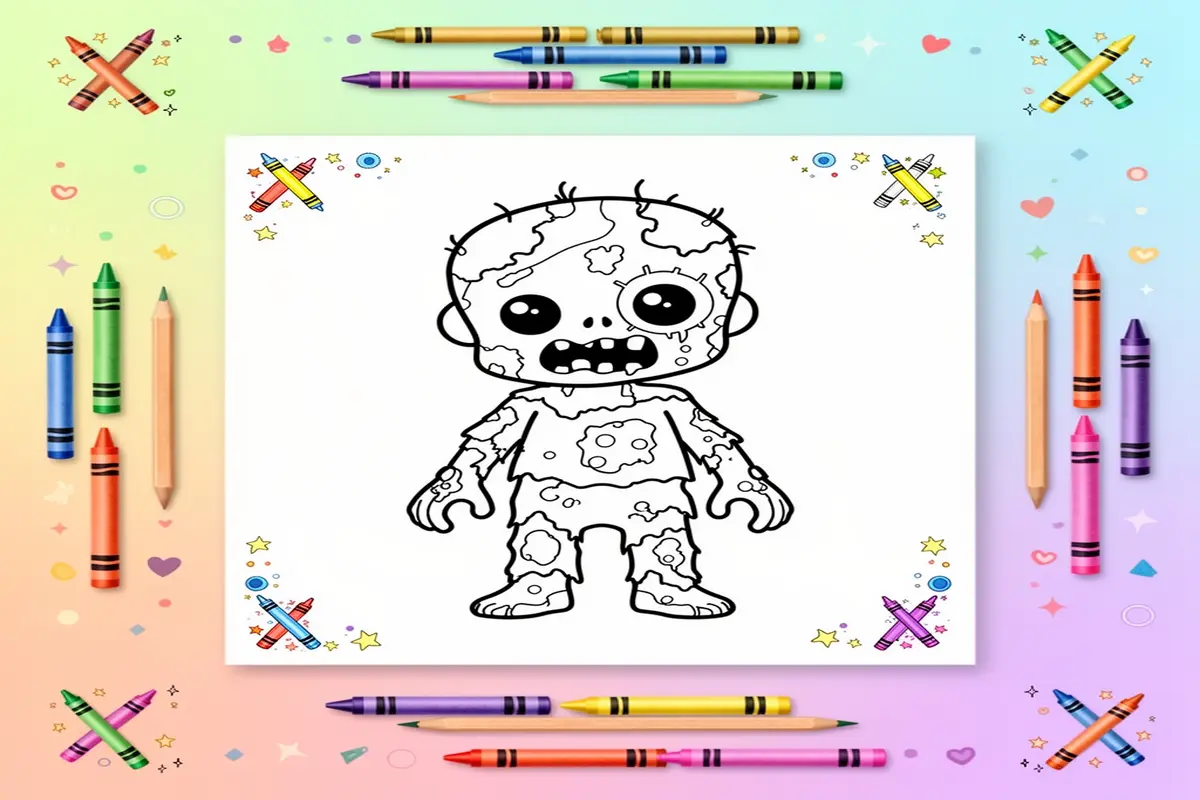
In a world saturated with digital entertainment, the simple act of coloring remains a profound gateway to imagination and emotional development. It’s a tactile, creative sanctuary where children can explore complex themes in a safe and controlled environment. This is where the unique appeal of zombie coloring pages for kids comes brilliantly to life. Far from mere spooky fun, these pages offer a creative conduit for children to engage with and demystify the concept of monsters, transforming fear into artistic expression. By giving kids the power to decide if a zombie is green, purple, or even polka-dotted, they reclaim narrative control. This journey into the whimsically macabre complements other fantastical explorations, such as the serene beauty found in our collection of free dolphin coloring pages. Whether your child is drawn to the gentle sea or the walking undead, each page is a new adventure in color and creativity, making zombie coloring pages for kids a surprisingly versatile tool for growth and fun.
Beyond the Groan: The Surprising Benefits of Monster-Themed Art
The Psychology of Play: Mastering Fears Through Color
At its core, engaging with zombie coloring pages for kids is an exercise in narrative therapy. Children often encounter monsters in stories and media; coloring these characters allows them to interact with these figures on their own terms. Choosing colors, adding silly accessories, or creating a friendly backdrop empowers them. This process of ‘taming’ the monster through art can reduce anxiety around the unknown and build resilience. It’s a safe space to ask “what if” and explore scenarios that, in reality, are firmly in the realm of fantasy, thereby mastering abstract fears through concrete, colorful action.
A Canvas for Creativity: Breaking Conventions with Every Hue
What color is a zombie? The beauty of these pages is that there is no right answer. This breaks children free from realistic color constraints and invites pure, unbridled creativity. Will they design a rainbow-zombie soccer team? A zombie in a dazzling ball gown? This thematic freedom encourages innovative thinking and problem-solving. Unlike coloring a realistic animal, where blue tigers might feel ‘wrong,’ zombie coloring pages for kids celebrate the absurd and the imaginative, strengthening cognitive flexibility and artistic confidence with every unconventional color choice.
Skill Development Disguised as Spooky Fun
Beneath the surface of the fun theme lies a powerful educational tool. The often-intricate details of zombie illustrations—tattered clothing, elaborate backgrounds, expressive faces—are excellent for developing fine motor skills and hand-eye coordination. Focusing on staying within the lines of a zombie’s messy hair or the bricks of a haunted house wall improves concentration and attention to detail. For children who may shy away from more traditional subjects, the engaging and slightly edgy theme of zombie coloring pages for kids can be the perfect motivator to sit down, focus, and develop these essential skills with genuine enthusiasm.
Part 2: Essential Materials & Preparation for Zombie Coloring Pages for Kids
Before your young artist brings their undead masterpieces to life, proper preparation is key. Having the right materials on hand transforms the activity from a simple pastime into a rich, creative experience that enhances fine motor skills and color theory understanding. This is especially true for zombie coloring pages for kids, where textures, shadows, and creative gore (think green skin and tattered clothing) can be explored. Let’s assemble the perfect toolkit to ensure those zombies look creatively spooky, not frustratingly scribbled.
The Foundation: Choosing Paper for Zombie Coloring Pages for Kids
The paper you choose is the unsung hero of any coloring project. For standard crayon or pencil work, a good-quality printer paper (90-100 GSM) is sufficient. However, if your child loves using markers or wants to experiment with wet mediums, upgrading to heavyweight paper (120-160 GSM) or even cardstock is essential. Heavier paper prevents bleed-through, reduces wrinkling, and allows for layering and blending colors—perfect for adding depth to a zombie’s murky grave or the slimy details on a monster. For a truly special project, consider using textured art paper; it can add a fantastic, gritty feel to a zombie’s tattered skin or a haunted house background.
Best Coloring Tools: Markers vs. Pencils
The choice between markers and colored pencils often defines the final look of your zombie coloring pages for kids.
Colored Pencils: Ideal for control and detail. They allow for precise shading in the hollows of a zombie’s eyes or the stitching on a Frankenstein monster. Wax-based pencils offer vibrant colors and smooth blending, while oil-based pencils provide a harder lead for finer details and intricate patterns on tombstones. They are also less messy and perfect for building up color layers to create realistic, rotten flesh tones.
Markers: These deliver bold, flat areas of vibrant color, making them great for filling large backgrounds like a night sky or a bold superhero zombie cape. Alcohol-based markers (blendable) are premium tools that allow seamless gradients, perfect for creating glowing eyes or eerie auras. However, water-based markers are more child-friendly and economical. Be mindful of potential bleed-through on thinner paper. A hybrid approach often works best: using markers for large areas and pencils for detailed work on the same zombie coloring pages for kids.
Finishing Touches: Gel Pens & Highlights
This is where the magic happens and those zombies truly pop. Gel pens, especially in metallic silver, gold, or glow-in-the-dark white, are phenomenal for adding details. Use them to draw drool, stitches, shiny buttons on a coat, or glowing radioactive ooze. White gel pens or a white colored pencil can be used to add highlights to eyes, teeth, or to create a misty fog effect. For a more advanced technique, consider a small set of acrylic paint markers for opaque highlights that can cover any underlying dark marker, ideal for creating spooky moonlit effects on your scary scenes. If your child is fascinated by all things eerie, they might also enjoy adding sparkle to our spooky coloring pages for kids with these same tools.
Perfect Workspace: Lighting & Ergonomics
A proper workspace ensures comfort and allows your child to focus on their creative undead designs. Good, natural lighting is ideal, but a bright, white LED desk lamp can prevent eye strain and ensure true color representation—so that “gruesome green” looks correct. Ergonomics matter: ensure the chair and table height allow your child’s feet to rest flat and their arms to comfortably reach the coloring page. A clean, flat surface is a must. Consider using a clipboard or a small drawing board to angle the page slightly, which can reduce hand fatigue during longer coloring sessions dedicated to completing complex zombie coloring pages for kids. Keep a scrap sheet of the same paper nearby for testing colors and techniques before applying them to the final artwork.
Part 3: Mastering zombie coloring pages for kids: Advanced Techniques for Professional Results
Ready to take your child’s coloring from simple to spectacular? This section delves into advanced techniques that transform zombie coloring pages for kids into masterpieces of texture, depth, and creativity. These methods not only enhance the final artwork but also build valuable artistic skills, turning a fun activity into a true learning experience. For more foundational practice with detailed creatures, exploring our realistic animal coloring pages can be a great first step.
Harmonious Palettes: Color Theory for the Undead
A well-chosen color scheme can make or break a zombie scene. Move beyond basic greens by teaching kids about color relationships. For a truly eerie, cohesive look, try an analogous palette—colors next to each other on the wheel, like sickly yellows, murky greens, and desaturated blues. This creates a unified, rotting effect. For dramatic pops—like glowing zombie eyes or a fresh wound—introduce complementary colors. A vivid, bloody red against a dull green zombie skin will instantly draw the eye and add professional contrast. Discussing mood is key: cooler, darker palettes feel more ominous, while oddly bright colors can create a silly, cartoonish zombie perfect for younger artists.
From Flat to Frightening: 3D Shading Techniques
Shading is what gives a zombie dimension, making it look like it’s lurching right off the page. Start with a simple light source. Decide: is the moonlight coming from the left? A flashlight from the right? Once established, practice pressure control. Using the side of a colored pencil, apply light pressure on the areas the light hits and gradually increase pressure as you move to the “shadow” side. For deep crevices—like eye sockets, open wounds, or torn clothing—use a sharp pencil and firm, layered strokes. A pro tip for zombie coloring pages for kids: add a thin, dark line immediately next to a highlight to make a feature like a bony finger or a torn ear really “pop” with three-dimensional realism.
Adding Gory Details: Mastering Texture
Texture brings the story of the zombie to life. Is it a freshly turned zombie with slick, wet skin, or a dusty, dried-out mummy? Here’s how to render different effects:
Rotting Skin: Use small, uneven circular motions with a green or grey pencil, leaving tiny specks of white paper showing through. Overlay with light brown or purple in patches.
Tattered Clothing: Use quick, sharp, and broken strokes in the direction of the fabric tear. Leave ragged edges unpainted for a frayed look.
Oozing Wounds: Start with a dark red center, then use a lighter red or pink pulling outward in wavy, gloopy lines. A dot of white gel pen can add a wet, slimy highlight.
For otherworldly textural inspiration, kids can practice on our alien coloring pages for kids, which encourage creative, non-realistic effects.
The Art of Undoing: Graceful Correction of Mistakes
Even professional artists make mistakes, and learning to fix them is part of the process. If color goes outside the lines, don’t panic! Often, you can incorporate the stray mark into the background—turn it into a shadow, a splatter of mud, or a blade of grass. For small, unwanted dark marks, gently lift color using the sticky-tack side of a poster putty or a specialized art eraser for colored pencils. If an area becomes too waxy from heavy layering and won’t accept more color, a light touch with a craft blade can gently* scrape off the top layer (this should be done by or with an adult). The best strategy is to work light to dark, as it’s easier to darken an area than to lighten it. Embrace “happy accidents”; a weird color blend might become the perfect shade for a zombie’s unusual bruise
Showcasing Your zombie coloring pages for kids: Creative Display Ideas
Once the final eerie green or shocking pink is applied, the fun doesn’t have to stop! Transforming finished artwork into home décor or gifts adds a wonderful sense of accomplishment. Here are inspiring ways to celebrate those spooky masterpieces.
Preserving Your Masterpiece: Archival Tips
To ensure your child’s zombie art stands the test of time, consider simple preservation methods. For a professional look, use acid-free spray fixative to prevent crayon or pastel smudging. Laminating sheets are a quick, kid-friendly option, making pages wipeable and durable. For a classic display, mount the coloring page on slightly larger black or neon construction paper before framing. This creates a bold border that makes the colors pop, perfect for a Halloween gallery wall in their room or your home office.
Beyond Display: Creative DIY Projects
Turn those colored pages into imaginative projects! Create unique Halloween greeting cards by gluing the finished zombie onto folded cardstock. Laminate and cut out characters to make one-of-a-kind bookmarks or window clings. For a fun party activity, let kids color multiple pages and bind them into a custom “Spooky Stories” comic book. These projects not only showcase creativity but also teach resourcefulness. For more creature-feature fun, pair your zombie art with our shark coloring pages free printable kids to create an entire monster menagerie.
Your zombie coloring pages for kids Questions Answered
How do you draw a zombie step by step?
Start with a simple oval for the head. Add lopsided eyes, a broken nose, and a stitched or open mouth. Draw a ragged body with one arm outstretched. Key details include torn clothing, exposed “bone” lines on limbs, and messy hair. Keep lines sketchy for a creepy feel. Let your child trace or color your drawing for a collaborative zombie coloring pages for kids project.
What colors should I use for a zombie?
Think beyond basic green! Use sickly yellows, murky grays, and purplish-blues for skin. Add shocking reds for wounds or bloodshot eyes. Contrast the zombie with bright, cheerful colors for clothes or background elements. This palette makes the artwork more dynamic and less frightening, perfect for zombie coloring pages for kids.
What are the benefits of coloring for kids?
Coloring boosts fine motor skills and hand-eye coordination. It serves as a calming, screen-free activity that reduces anxiety and encourages focus. Choosing colors and staying within lines fosters creativity, decision-making, and a sense of pride in their finished work, making it a valuable developmental tool.
How to make a zombie look realistic when coloring?
Use shading! Apply a base skin color lightly, then add darker shades in hollow areas like cheeks, eye sockets, and under the chin. Blend colors with a finger or cotton swab for a mottled, decaying effect. Add tiny red veins in the eyes and subtle green or purple shadows around wounds for extra creepy detail.
Are zombie themes appropriate for young children?
It depends on the child and presentation. Cartoonish, silly zombies with goofy expressions are generally fine and can help kids explore “scary” themes in a safe, controlled way. Always consider your child’s sensitivity. The key is to keep it light and fun, focusing on the creative process rather than fear.
Final Thoughts: Your zombie coloring pages for kids Journey Begins
Embarking on a coloring adventure with zombie pages is more than just an art activity; it’s a gateway to creativity, conversation, and conquering silly fears. These pages allow children to explore spooky themes within a safe and colorful framework, building confidence and artistic skills with every stroke. The benefits—from improved motor control to peaceful mindfulness—last long after the final page is displayed or transformed into a gift.
We hope this guide inspires countless hours of creative, spooky fun. Remember, there’s no right or wrong way to color a zombie—only your child’s unique imagination at play. Ready for your next adventure? Explore our dinosaur coloring pages for kids for more prehistoric coloring excitement!